一、线程概念
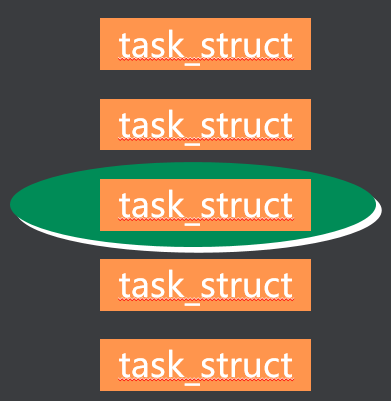
进程有独立的地址空间,Linux为每个进程创建task_struct,每个进程都参与内核调度,互不影响,但是进程在切换时系统开销大,所以很多操作系统引入了轻量级进程LWP,同一进程中的线程共享相同地址空间,Linux不区分进程、线程。
线程特点:
通常线程指的是共享相同地址空间的多个任务
使用多线程的好处
- 大大提高了任务切换的效率
- 避免了额外的TLB & cache的刷新
线程共享资源:
一个进程中的多个线程共享以下资源:
- 可执行的指令
- 静态数据
- 进程中打开的文件描述符
- 当前工作目录
- 用户ID
- 用户组ID
线程私有资源:
每个线程私有的资源包括:
- 线程ID (TID)
- PC(程序计数器)和相关寄存器
- 堆栈
- 错误号 (errno)
- 优先级
- 执行状态和属性
二、线程创建
1、Linux线程库
pthread线程库中提供了如下基本操作:
同步和互斥机制:
2、线程创建– pthread_create
#include  <pthread.h>
 int  pthread_create(pthread_t *thread, const
       pthread_attr_t *attr, void *(*routine)(void *), void *arg);
成功返回0,失败时返回错误码
- thread 线程对象
- attr 线程属性,NULL代表默认属性
- routine 线程执行的函数
- arg 传递给routine的参数 ,参数是void * ,注意传递参数格式
单线程创建:
#include <stdio.h>
#include <pthread.h>
#include <unistd.h>

void *testThread(void *arg) {
    printf("this is thread test, pid=%d, tid=%lu\n", getpid(), pthread_self());
    printf("input arg=%d\n",(int)arg);
    pthread_exit(NULL);
    printf("after pthread exit\n");
}

int main() {

    pthread_t tid;
    int ret;
    int arg = 5;

    ret = pthread_create(&tid, NULL, testThread, (void *)arg);

    printf("this is main thread, tid=%lu\n", tid);

    sleep(10);

}
多线程创建:
#include <pthread.h>
#include <stdio.h>
#include <unistd.h>

void *testThread(void *arg){

    printf("this is thread test, pid=%d, tid=%lu\n", getpid(), pthread_self());
    printf("this is %d thread\n", (int)arg);
    while(1) {
        sleep(1);
    }

}

int main() {

    pthread_t tid[5];
    int ret;
    int arg = 5;
    int i;

    for(i=0; i<5;i++) {
        ret = pthread_create(&tid[i], NULL, testThread, (void *)i);
        printf("this is main thread, tid=%lu\n", tid[i]);
    }

    while(1) {

        sleep(1);

    }

}
3、线程结束– pthread_exit
#include  <pthread.h>
 void  pthread_exit(void *retval);
- 结束当前线程
- retval可被其他线程通过pthread_join获取
- 线程私有资源被释放
4、线程查看– tid函数
pthread_t  pthread_self(void)   //查看自己的TID
#include <pthread.h>
pthread_t pthread_self(void);
5、线程回收– pthread_join
#include  <pthread.h>
 int  pthread_join(pthread_t thread, void **retval);
对于一个默认属性的线程 A来说,线程占用的资源并不会因为执行结束而得到释放 。
- 成功返回0,失败时返回错误码
- thread 要回收的线程对象
- 调用线程阻塞直到thread结束
- *retval 接收线程thread的返回值
#include <stdio.h>
#include <pthread.h>
#include <unistd.h>

void *func(void *arg) {

    printf("this is child thread\n");
    sleep(25);
    pthread_exit("thread return");

}


int main() {

    pthread_t tid[100];
    void *retv;
    int i;

    for(i=0; i<100; i++) {
        pthread_create(&tid[i], NULL, func, NULL);
    }

    for(i=0; i<100; i++) {

        pthread_join(tid[1], &retv);
        printf("thread ret=%s\n", (char *)retv); //ret=thread return

    }

    while(1) {
        sleep(1);
    }

}
6、线程分离– pthead_detach(线程回收的第二种方式)
方式一:
int pthread_detach(pthread_t thread); //成功:0;失败:错误号
指定该状态,线程主动与主控线程断开关系。线程结束后(不会产生僵尸线程)
#include <stdio.h>
#include <pthread.h>
#include <unistd.h>


void *func() {

    pthread_detach(pthread_self());
    printf("this is child thread\n");
    sleep(25);
    pthread_exit("thread return!");

}

int main() {

    pthread_t tid[100];
    void *retv;
    int i;

    for(i=0; i<100; i++) {

        pthread_create(&tid[i], NULL, func, NULL);

    }
    while(1) {
        sleep(1);
    }

}
方式二:
设置线程属性为分离:
pthread_attr_t attr;       //通过线程属性来设置游离态(分离态)
pthread_attr_init(&attr);
pthread_attr_setdetachstate(&attr, PTHREAD_CREATE_DETACHED);
#include <pthread.h>
#include <stdio.h>
#include <unistd.h>

void *func(void *arg) {
    printf("this is child thread\n");
    sleep(25);
    pthread_exit("thread return");
}

int main() {

    pthread_t tid[1000];
    void *retv;
    int i;
    pthread_attr_t attr;
    pthread_attr_init(&attr);
    pthread_attr_setdetachstate(&attr, PTHREAD_CREATE_DETACHED);

    for(i=0; i<1000; i++) {

        pthread_create(&tid[i], &attr, func, NULL);

    }

    while(1) {

        sleep(1);

    }


}
7、取消一个线程
- int pthread_cancel(pthread_t thread); 杀死一个线程
- void pthread_testcancel(void);
- int pthread_setcancelstate(int state, int *oldstate);
- PTHREAD_CANCEL_ENABLE
- PTHREAD_CANCEL_DISABLE
- int pthread_setcanceltype(int type, int *oldtype);
- PTHREAD_CANCEL_DEFERRED
- PTHREAD_CANCEL_ASYNCHRONOUS
意义:随时杀掉一个线程
int pthread_cancel(pthread_t thread);
注意:线程的取消要有取消点才可以,不是说取消就取消,线程的取消点主要是阻塞的系统调用

如果没有取消点,手动设置一个
void pthread_testcancel(void);

设置取消使能或禁止
int pthread_setcancelstate(int state, int *oldstate);
PTHREAD_CANCEL_ENABLE
PTHREAD_CANCEL_DISABLE

设置取消类型
int pthread_setcanceltype(int type, int *oldtype);
PTHREAD_CANCEL_DEFERRED                等到取消点才取消
PTHREAD_CANCEL_ASYNCHRONOUS           目标线程会立即取消
#include <stdio.h>
#include <pthread.h>
#include <unistd.h>

void *func(void *arg) {
    printf("This is child thread\n");
    pthread_setcancelstate(PTHREAD_CANCEL_DISABLE, NULL);
    {
        sleep(5);
        pthread_testcancel();
    }
    pthread_setcancelstate(PTHREAD_CANCEL_ENABLE, NULL);
    while(1) {
        sleep(1);
    }
    pthread_exit("thread return");
}

int main() {

    pthread_t tid;
    void *retv;
    int i;
    pthread_create(&tid, NULL,func, NULL);
    sleep(1);
    pthread_cancel(tid);
    pthread_join(tid, &retv);
    while(1) {
        sleep(1);
    }

}
8、线程清理
- void pthread_cleanup_push(void (*routine) (void *), void *arg)
- void pthread_cleanup_pop(int execute)
必要性: 当线程非正常终止,需要清理一些资源。
void pthread_cleanup_push(void (*routine) (void *), void *arg)
void pthread_cleanup_pop(int execute)
routine 函数被执行的条件:
- 被pthread_cancel取消掉。
- 执行pthread_exit
- 非0参数执行pthread_cleanup_pop()
注意:
1.必须成对使用,即使pthread_cleanup_pop不会被执行到也必须写上,否则编译错误
2.pthread_cleanup_pop()被执行且参数为0,pthread_cleanup_push回调函数routine不会被执行.
3.pthread_cleanup_push 和pthread_cleanup_pop可以写多对,routine执行顺序正好相反
4.线程内的return 可以结束线程,也可以给pthread_join返回值,但不能触发pthread_cleanup_push里面的回调函数,所以我们结束线程尽量使用pthread_exit退出线程。
#include <pthread.h>
#include <stdio.h>
#include <unistd.h>

void cleanup(void *arg) {
    printf("cleanup, arg=%s\n", (char*)arg);
}

void cleanup2(void *arg) {
    printf("cleanup2, arg=%s\n", (char*)arg);
}

void *func(void *arg) {

    printf("this is child thread\n");
    pthread_setcanceltype(PTHREAD_CANCEL_ASYNCHRONOUS, NULL);
    pthread_cleanup_push(cleanup, "abcd");
    pthread_cleanup_push(cleanup2, "efgh");

    {
        sleep(1);
    }

//    return "1234";

//    while(1) {
//        printf("sleep\n");
//        sleep(1);
//    }

    pthread_cleanup_pop(1);
    pthread_cleanup_pop(1);
    sleep(10);
    pthread_exit("thread return");

}

int main() {
    pthread_t tid;
    void *retv;
    int i;
    pthread_create(&tid, NULL, func, NULL);
    sleep(1);
    pthread_join(tid, &retv);
    printf("thread ret=%s\n", (char*)retv);
    while(1) {
        sleep(1);
    }


}
三、线程的同步与互斥
(一)互斥
一次只允许一个任务(进程、线程)访问的共享资源
访问临界资源的代码
mutex互斥锁
任务访问临界资源前申请锁,访问完后释放锁
(二)互斥锁
1、互斥锁初始化– pthread_mutex_init
#include  <pthread.h>
 int  pthread_mutex_init(pthread_mutex_t *mutex,
       const pthread_mutexattr_t *  attr);
- 成功时返回0,失败时返回错误码
- mutex 指向要初始化的互斥锁对象
- attr 互斥锁属性,NULL表示缺省属性
- man 函数出现 No manual entry for pthread_mutex_xxx解决办法 apt-get install manpages-posix-dev
两种方法创建互斥锁,静态方式和动态方式
动态方式:
int pthread_mutex_init(pthread_mutex_t *restrict mutex,const pthread_mutexattr_t *restrict attr);
其中mutexattr用于指定互斥锁属性,如果为NULL则使用缺省属性。
静态方式:
pthread_mutex_t mutex = PTHREAD_MUTEX_INITIALIZER;
2、互斥锁销毁 pthread_mutex_destroy
int pthread_mutex_destroy(pthread_mutex_t *mutex)
在Linux中,互斥锁并不占用任何资源,因此LinuxThreads中的 pthread_mutex_destroy()除了检查锁状态以外(锁定状态则返回EBUSY)没有其他动作。
3、申请锁 – pthread_mutex_lock
#include  <pthread.h>
 int  pthread_mutex_lock(pthread_mutex_t *mutex);
 int pthread_mutex_trylock(pthread_mutex_t *mutex)
- 成功时返回0,失败时返回错误码
- mutex 指向要初始化的互斥锁对象
- pthread_mutex_lock 如果无法获得锁,任务阻塞
- pthread_mutex_trylock 如果无法获得锁,返回EBUSY而不是挂起等待
4、释放锁 – pthread_mutex_unlock
#include  <pthread.h>
 int  pthread_mutex_unlock(pthread_mutex_t *mutex);
- 成功时返回0,失败时返回错误码
- mutex 指向要初始化的互斥锁对象
- 执行完临界区要及时释放锁
#include <stdio.h>
#include <unistd.h>
#include <pthread.h>
#include <string.h>

pthread_mutex_t mutex = PTHREAD_MUTEX_INITIALIZER;

FILE *fp;

void *func2(void *arg) {

    pthread_detach(pthread_self());
    printf("This is func2 thread\n");
    char str[] = "You read func2 thread\n";
    char c;
    int i = 0;
    while(1) {
        pthread_mutex_lock(&mutex);
        while(i<strlen(str)) {
            c = str[i];
            fputc(c, fp);
            i++;
            usleep(1);
        }
        pthread_mutex_unlock(&mutex);
        i = 0;
        usleep(1);
    }
    pthread_exit("func2 exit");

}

void *func(void *arg) {

    pthread_detach(pthread_self());
    printf("This is func1 thread\n");
    char str[] = "You read func1 thread\n";
    char c;
    int i = 0;
    while(1) {
        pthread_mutex_lock(&mutex);
        while(i<strlen(str)) {
            c = str[i];
            fputc(c, fp);
            i++;
            usleep(1);
        }
        pthread_mutex_unlock(&mutex);
        i = 0;
        usleep(1);
    }
    pthread_exit("func1 exit");

}

int main() {

    pthread_t tid, tid2;
    void *retv;
    int i;

    fp = fopen("1.txt", "a+");
    if(fp == NULL) {
        perror("fopen");
        return 0;
    }

    pthread_create(&tid, NULL, func, NULL);
    pthread_create(&tid2, NULL, func2, NULL);

    while(1) {

        sleep(1);

    }

}
5、读写锁
初始化一个读写锁   pthread_rwlock_init
读锁定读写锁        pthread_rwlock_rdlock
非阻塞读锁定  pthread_rwlock_tryrdlock
写锁定读写锁      pthread_rwlock_wrlock
非阻塞写锁定      pthread_rwlock_trywrlock
解锁读写锁         pthread_rwlock_unlock
释放读写锁         pthread_rwlock_destroy
必要性:提高线程执行效率
特性:
写者:写者使用写锁,如果当前没有读者,也没有其他写者,写者立即获得写锁;否则写者将等待,直到没有读者和写者。
读者:读者使用读锁,如果当前没有写者,读者立即获得读锁;否则读者等待,直到没有写者。
注意:
同一时刻只有一个线程可以获得写锁,同一时刻可以有多个线程获得读锁。
读写锁出于写锁状态时,所有试图对读写锁加锁的线程,不管是读者试图加读锁,还是写者试图加写锁,都会被阻塞。
读写锁处于读锁状态时,有写者试图加写锁时,之后的其他线程的读锁请求会被阻塞,以避免写者长时间的不写锁
#include <pthread.h>
#include <stdio.h>
#include <unistd.h>
#include <string.h>


pthread_rwlock_t rwlock;

FILE *fp;
void * read_func(void *arg){
    pthread_detach(pthread_self());
    printf("read thread\n");
    char buf[32]={0};
    while(1){
        //rewind(fp);
        pthread_rwlock_rdlock(&rwlock);
        while(fgets(buf,32,fp)!=NULL){
            printf("%d,rd=%s\n",(int)arg,buf);
            usleep(1000);
        }
        pthread_rwlock_unlock(&rwlock);
        sleep(1);
    }

}


void *func2(void *arg){
    pthread_detach(pthread_self());
    printf("This func2 thread\n");

    char str[]="I write func2 line\n";
    char c;
    int i=0;
    while(1){
        pthread_rwlock_wrlock(&rwlock);
        while(i<strlen(str))
        {
            c = str[i];
            fputc(c,fp);
            usleep(1);
            i++;
        }
        pthread_rwlock_unlock(&rwlock);
        i=0;
        usleep(1);

    }

    pthread_exit("func2 exit");

}

void *func(void *arg){
    pthread_detach(pthread_self());
    printf("This is func1 thread\n");
    char str[]="You read func1 thread\n";
    char c;
    int i=0;
    while(1){
        pthread_rwlock_wrlock(&rwlock);
        while(i<strlen(str))
        {
            c = str[i];
            fputc(c,fp);
            i++;
            usleep(1);
        }
        pthread_rwlock_unlock(&rwlock);
        i=0;
        usleep(1);

    }
    pthread_exit("func1 exit");
}


int main(){
    pthread_t tid1,tid2,tid3,tid4;
    void *retv;
    int i;
    fp = fopen("1.txt","a+");
    if(fp==NULL){
        perror("fopen");
        return 0;
    }
    pthread_rwlock_init(&rwlock,NULL);
    pthread_create(&tid1,NULL,read_func,1);
    pthread_create(&tid2,NULL,read_func,2);
    pthread_create(&tid3,NULL,func,NULL);
    pthread_create(&tid4,NULL,func2,NULL);
    while(1){
        sleep(1);
    }

}
(三)信号量
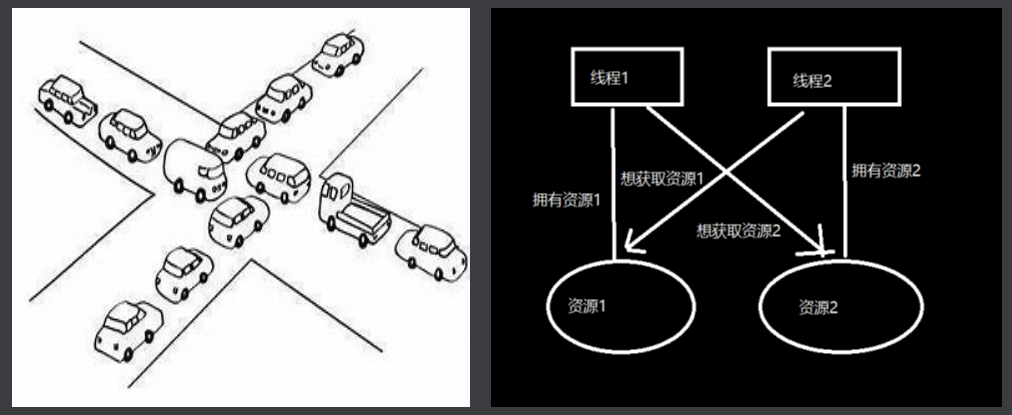
1、什么是死锁
2、条件变量
应用场景:生产者消费者问题,是线程同步的一种手段。
必要性:为了实现等待某个资源,让线程休眠。提高运行效率
pthread_cond_wait(&m_cond,&m_mutex);
int pthread_cond_timedwait(pthread_cond_t *restrict cond,
           pthread_mutex_t *restrict mutex,
           const struct timespec *restrict abstime);
int pthread_cond_signal(pthread_cond_t *cond);
int pthread_cond_broadcast(pthread_cond_t *cond);
使用步骤:
初始化:
静态初始化
pthread_cond_t   cond = PTHREAD_COND_INITIALIZER;      //初始化条件变量
pthread_mutex_t  mutex = PTHREAD_MUTEX_INITIALIZER;  //初始化互斥量
或使用动态初始化
pthread_cond_init(&cond);
生产资源线程:
pthread_mutex_lock(&mutex);
开始产生资源
pthread_cond_sigal(&cond); //通知一个消费线程
或者
pthread_cond_broadcast(&cond); //广播通知多个消费线程
pthread_mutex_unlock(&mutex);
消费者线程:
pthread_mutex_lock(&mutex);

while (如果没有资源){   //防止惊群效应

pthread_cond_wait(&cond, &mutex);

}
有资源了,消费资源
pthread_mutex_unlock(&mutex);
注意:
pthread_cond_wait(&cond, &mutex),在没有资源等待是是先unlock 休眠,等资源到了,再lock
所以pthread_cond_wait he pthread_mutex_lock 必须配对使用。
#include <pthread.h>
#include <stdio.h>
#include <unistd.h>
#include <stdlib.h>

pthread_cond_t hasTaxi = PTHREAD_COND_INITIALIZER;
pthread_mutex_t lock = PTHREAD_MUTEX_INITIALIZER;

struct taxi {
    struct taxi *next;
    int num;
};

struct taxi *Head = NULL;

void *taxiarv(void *arg) {
    printf("taxi arrived thread\n");
    pthread_detach(pthread_self());
    struct taxi *tx;
    int i = 1;
    while(1) {
        tx = malloc(sizeof(struct taxi));
        tx->num = i++;
        printf("taxi %d comming\n", tx->num);
        pthread_mutex_lock(&lock);
        tx->next = Head;
        Head = tx;
        pthread_cond_signal(&hasTaxi);
        pthread_mutex_unlock(&lock);
        sleep(1);
    }
    pthread_exit(0);

}
void *takeTaxi(void *arg) {
    printf("take taxi thread\n");
    pthread_detach(pthread_self());
    struct taxi *tx;

    while(1) {
        pthread_mutex_lock(&lock);
        while(Head == NULL) {
            pthread_cond_wait(&hasTaxi, &lock);
        }
        tx = Head;
        Head = tx->next;
        printf("%d,Take taxi %d\n", (int)arg, tx->num);
        free(tx);
        pthread_mutex_unlock(&lock);
    }
    pthread_exit(0);

}

int main() {
    pthread_t tid1, tid2, tid3;

    pthread_create(&tid1, NULL, taxiarv, NULL);
    pthread_create(&tid1, NULL, takeTaxi, NULL);
    pthread_create(&tid1, NULL, takeTaxi, NULL);
    pthread_create(&tid1, NULL, takeTaxi, NULL);

    while(1) {
        sleep(1);
    }

}
3、线程池
#include <pthread.h>
#include <stdio.h>
#include <unistd.h>
#include <stdlib.h>

#define POOL_NUM 10

typedef struct Task {
    void *(*func)(void *arg);
    void *arg;
    struct Task *next;
}Task;

typedef struct ThreadPool {
    pthread_mutex_t taskLock;
    pthread_cond_t newTask;

    pthread_t tid[POOL_NUM];
    Task *queue_head;
    int busywork;
}ThreadPool;

ThreadPool *pool;

void *workThread(void *arg) {
    while(1) {
        pthread_mutex_lock(&pool->taskLock);
        pthread_cond_wait(&pool->newTask, &pool->taskLock);

        Task *ptask = pool->queue_head;
        pool->queue_head = pool->queue_head->next;

        pthread_mutex_unlock(&pool->taskLock);

        ptask->func(ptask->arg);
        pool->busywork--;
    }
}

void *realwork(void *arg) {
    printf("Finish work %d\n", (int)arg);
}

void pool_add_task(int arg) {
    Task *newTask;

    pthread_mutex_lock(&pool->taskLock);
    while(pool->busywork >= POOL_NUM) {

        pthread_mutex_unlock(&pool->taskLock);
        usleep(10000);
        pthread_mutex_lock(&pool->taskLock);

    }
    pthread_mutex_unlock(&pool->taskLock);
    newTask = malloc(sizeof(Task));
    newTask->func = realwork;
    newTask->arg = arg;

    pthread_mutex_lock(&pool->taskLock);
    Task *member = pool->queue_head;

    if(member == NULL) {
        pool->queue_head = newTask;
    }else {
        while(member->next!=NULL) {
            member=member->next;
        }
        member->next = newTask;
    }
    pool->busywork++;
    pthread_cond_signal(&pool->newTask);
    pthread_mutex_unlock(&pool->taskLock);
}

void pool_init() {
    pool = malloc(sizeof(ThreadPool));
    pthread_mutex_init(&pool->taskLock, NULL);
    pthread_cond_init(&pool->newTask, NULL);
    pool->queue_head = NULL;
    pool->busywork=0;

    for(int i=0; i<POOL_NUM; i++) {

        pthread_create(&pool->tid[i], NULL, workThread, NULL);

    }

}

void pool_destroy() {
    Task *head;
    while(pool->queue_head!=NULL) {
        head = pool->queue_head;
        pool->queue_head = pool->queue_head->next;
        free(head);
    }
    pthread_mutex_destroy(&pool->taskLock);
    pthread_cond_destroy(&pool->newTask);
    free(pool);
}

int main() {

    pool_init();
    sleep(20);

    for(int i = 1; i<20; i++) {
        pool_add_task(i);
    }

    sleep(5);

    pool_destroy();

}